Tuesday, August 9, 2016

Upcycling with Indigo Dye Part Two

Yesterday I started a post about the shibori tie dye method using natural indigo dye.

Today I'm showing more photos.


 I wore gloved because this will stain your skin.


In this photo, I'm cutting the strings on one of the pieces I tied.


Rinsing the pieces in clear water.


My Lucky Brand shirt after I dunked it briefly for more color. Still in oxidating stage.


My sister-in-law gave me most of these items to play with. My backyard looked like a hippie village. LOL. 

So, everything had been laundered a second time (to make sure the dye was washed out) and here are what my new pieces look like.


This is my Lucky Brand shirt. I just love it. It's so soft.

This is the Old Navy cami. I wore this to a store right after taking the photo and the clerk immediately said "I love your outfit". 

And so for the final photo - the sale rack cold shoulder dress that started it all. I had decided that I wanted a coral color for my clearance rack ivory dress. I picked up some Rit dye colors that should have given me a coral, but instead came out pink - still pretty.  My daughter was intrigued with this, so she wanted a dress and believe it or not there was ONE LEFT at the store (Target) on the clearance rack. Since I had already used the indigo kit - she wanted - you guessed it BLUE - so I went with more Rit. (note -after the fact, I realized that I should have bought the dye for synthetic fabrics since the nylon slip it came with would have taken the color. Still learning!)  So here we are on Father's Day with our (first ever) Mother / Daughter dresses. 


This whole adventure was so much fun. I will be keeping my eye out for a great bargain on white cotton sheets so I can transform them into something - just for fun. 

Thanks for stopping by! I hope I have inspired you to try something like this. Let me know if you do.


Monday, August 8, 2016

Upcycling with Indigo Dye Part One

I recently bought a dress on a clearance rack. It was ivory and adorable, but it's pale color made me think of a night shirt, so after I wore it once, I decided I would dye it. While looking at various options and fell in love with the indigo dye kits I saw. I mean - fascinated! I think it was because it was the beginning of summer and I had just returned from the beach. I was in love with blue and white.

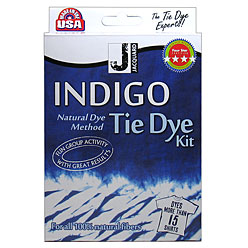
So, I ordered this indigo dye kit.  I liked the fact that it was all natural and so ancient. While I waited for it to arrive, I went to the thrift store for some white pieces to experiment with.

I found a white Lucky Brand long sleeve shirt that I loved just as it was... but alas, I had to offer it up for the experiment. I also found an Old Navy spaghetti strap cotton cami . Again - I loved it as it was but had to use it. 

Aren't they just gorgeous? When my sister-in-law heard of my adventure - she offered up several willing victims. So, I read up on the Shibori tie die methods. The folding, the wrapping on poles, the threading - all of it. I gathered all my pieces up one morning and began folding, wrapping and tying everything up. A friend gave me a large PCV pipe to use, and I found a smaller spare rod so I could try different things.  Here's my pile of willing victims.

So, I moved this experiment outside. I had a tin tub, and a large white bucket. I mixed the dye according to directions and let it set.  The following are some random photos my daughter took while I worked.


Notice the green color? It changed color as the air gets to it.


Below is one of the pieces I wrapped around a large pole. 


When I removed them from the dye - I placed them in the tin bucket and rinsed with water. Then I set them out to dry while other pieces where placed in the dye. I had an assembly line going!


One of my helpers inspecting everything.


This is my Lucky Brand shirt. Isn't this stage pretty?


 This is a pillow case. I plan to do an entire sheet set just for fun. :)


I put my Lucky Brand shirt back into the dye briefly to make it more blue.

That's all for today!
Check back tomorrow for more photos and final pictures - including the dresses that started this adventure! 

Monday, August 1, 2016

Travel and Summer

Summer is a wonderful time for traveling. My favorite place to go is to the beach - any beach, but I love Florida's Emerald coast.

The Mixed Media Monthly Challenge Blog has embraced the travel theme for this month's challenge. I found this one quite easy to do. I went with a simple beach scene. Who wouldn't want to be there now?


I found the red reclaimed frame in a thrift store and just had to have it.

The sponsor for the Mixed Media Challenge Blog this month is Lindsay Weirich. She has a HUGE You Tube Channel. She is known as The Frugal Crafter. She is offering a free spot in her new online Craftsy Class called Mix It Up Mixed Media for our winner!  She is ALSO offering a half off code to her class to all our viewers. Here is the code for the discount


Be sure to enter the challenge for a chance at her prize.

Please follow these rules to be eligible for placements and prizes. Entries not following our rules will be deleted.

* You must use our challenge graphic in your challenge post.
* You must comment on at least 3 design team member's blogs. 
* Your post must link back to the Mixed Media Monthly Challenge post
* Add a link to your direct post, not your entire blog, a YouTube Video or a Pinterest Board
* You can combine with up to 4 other challenges. 
* No Backlinking allowed! Any back-linked entries will be deleted.
* You can enter up to 5 times, create whatever you want, and HAVE FUN!

You have until 11:55 pm EST on August 31 st to enter!